
Closing defects under tension in areas such as the scalp and back may be challenging during dermatologic surgery. Different techniques have been advocated to ease the placement of the first deep suture under tension, including the slip-knot stitch, pully stitch, horizontal mattress suture, pulley set-back dermal suture, and tandem pulley stitch.
INTRODUCTION
Closing defects under tension in areas such as the scalp and back may be challenging during dermatologic surgery. Different techniques have been advocated to ease the placement of the first deep suture under tension, including the slip-knot stitch, pully stitch, horizontal mattress suture, pulley set-back dermal suture, and tandem pulley stitch.1,2
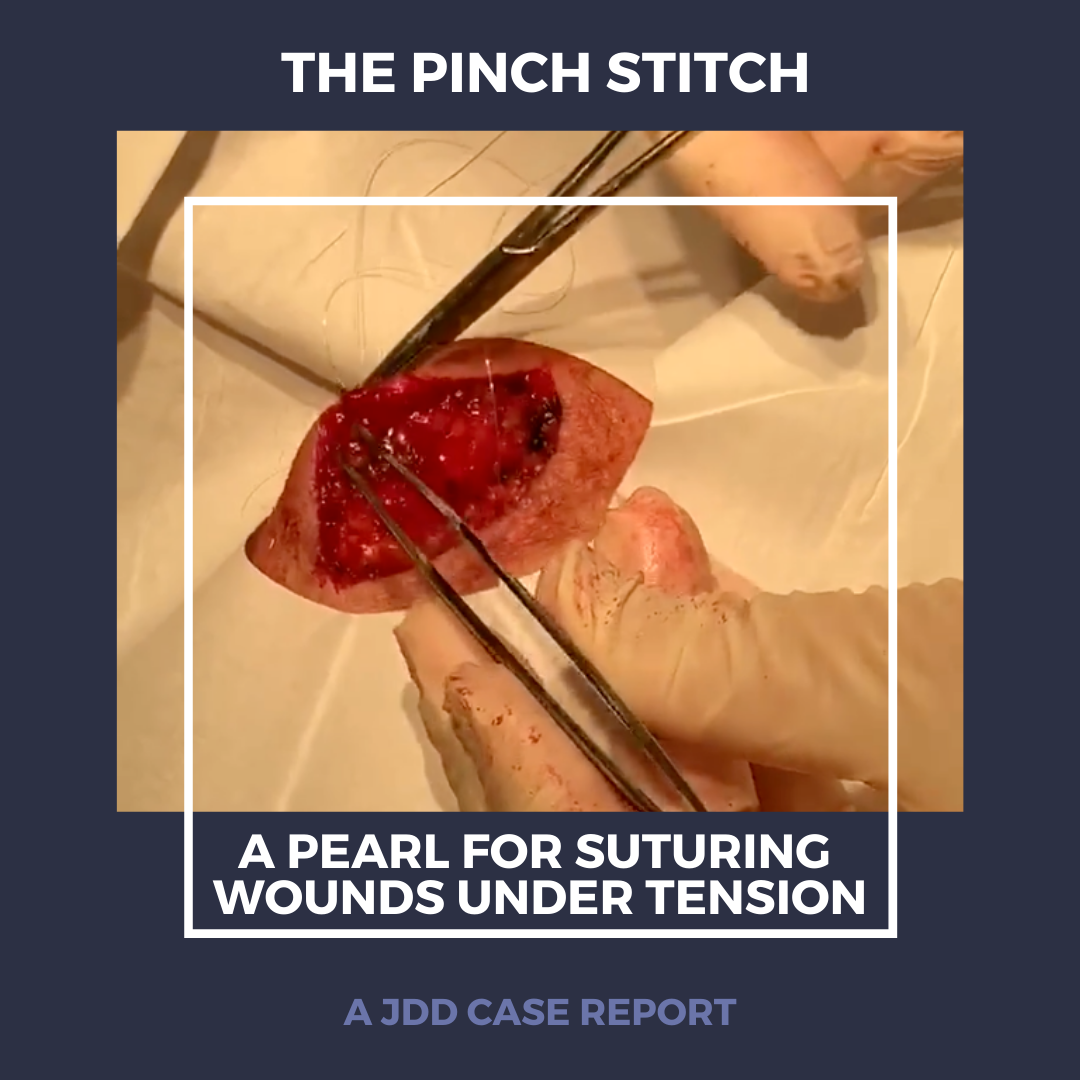
The authors have tried different techniques to reduce wound tension and have found the Pinch Stitch to be an easy and relatively non-challenging method to teach junior dermatology residents who struggle with closing wounds under tension. Often, when closing wounds under tension, not only is it very difficult to approximate the wound edges, it is difficult to keep them approximated after the first throw of the suture. It is common practice for the surgeon’s assistant to push the wound edges together with their hands. This technique however is very cumbersome and not only uncomfortable to the patient but also theoretically a higher risk for needle pokes with more hands so close to the surgical field. As previously described in plastic surgery and dermatologic literature, the Pinch Stitch technique offers a novel solution.3,4 In this technique, after the surgeon completes the first throw of the deep suture, the surgeon lifts each end of the suture perpendicular to the surgical defect, where the surgical assistant is able to pinch the base of these sutures, holding the suture in place with two fingers while not losing any tension. The surgeon then completes a second throw (now securing the knot) as the assistant releases the pinch. This technique keeps the wound approximated in a minimally invasive manner (using two fingers as opposed to two hands) without losing any tension between the first and second throws. The following steps in placing a Pinch Stitch have been demonstrated in the video (See video below for an example of this technique):
The knot is secured as the assistant removes their fingers.
Sample Video
REFERENCES
-
- Kantor J. The pulley set-back dermal suture: an easy to implement everting suture technique for wounds under tension. J Am Acad Dermatol. 2015;72:e29-30.
- Lee CH, Wang T. A novel suture technique for high-tension wound closure: the tandem pulley stitch. Dermatol Surg. 2015;41:975-977.
- Morley KW, Butler LK, MacCormack MA, Tiger JB. The pinch stitch. J Am Acad Dermatol.2017;77:e75-76.
- Nantel-Battista M, Murray C. dermatologic surgical pearls: tips for closing a defect under tension. J Cutan Med Surg. 2015;19:283-286.
Farshchian Mehdi PhD MD, Sklar R Lindsay MD, (2020). The Pinch Stitch: A Pearl for Suturing Wounds Under Tension. Journal of Drugs in Dermatology, 19(12), 807-809.
Content and images used with permission from the Journal of Drugs in Dermatology.
Adapted from original article for length and style.
Did you enjoy this case report? Find more here.